Once you’re done customizing the template and you’re confident everything looks the way you want, it’s time for publishing and the final step.
Before you hit Publish, it’s important to set up Site Settings.
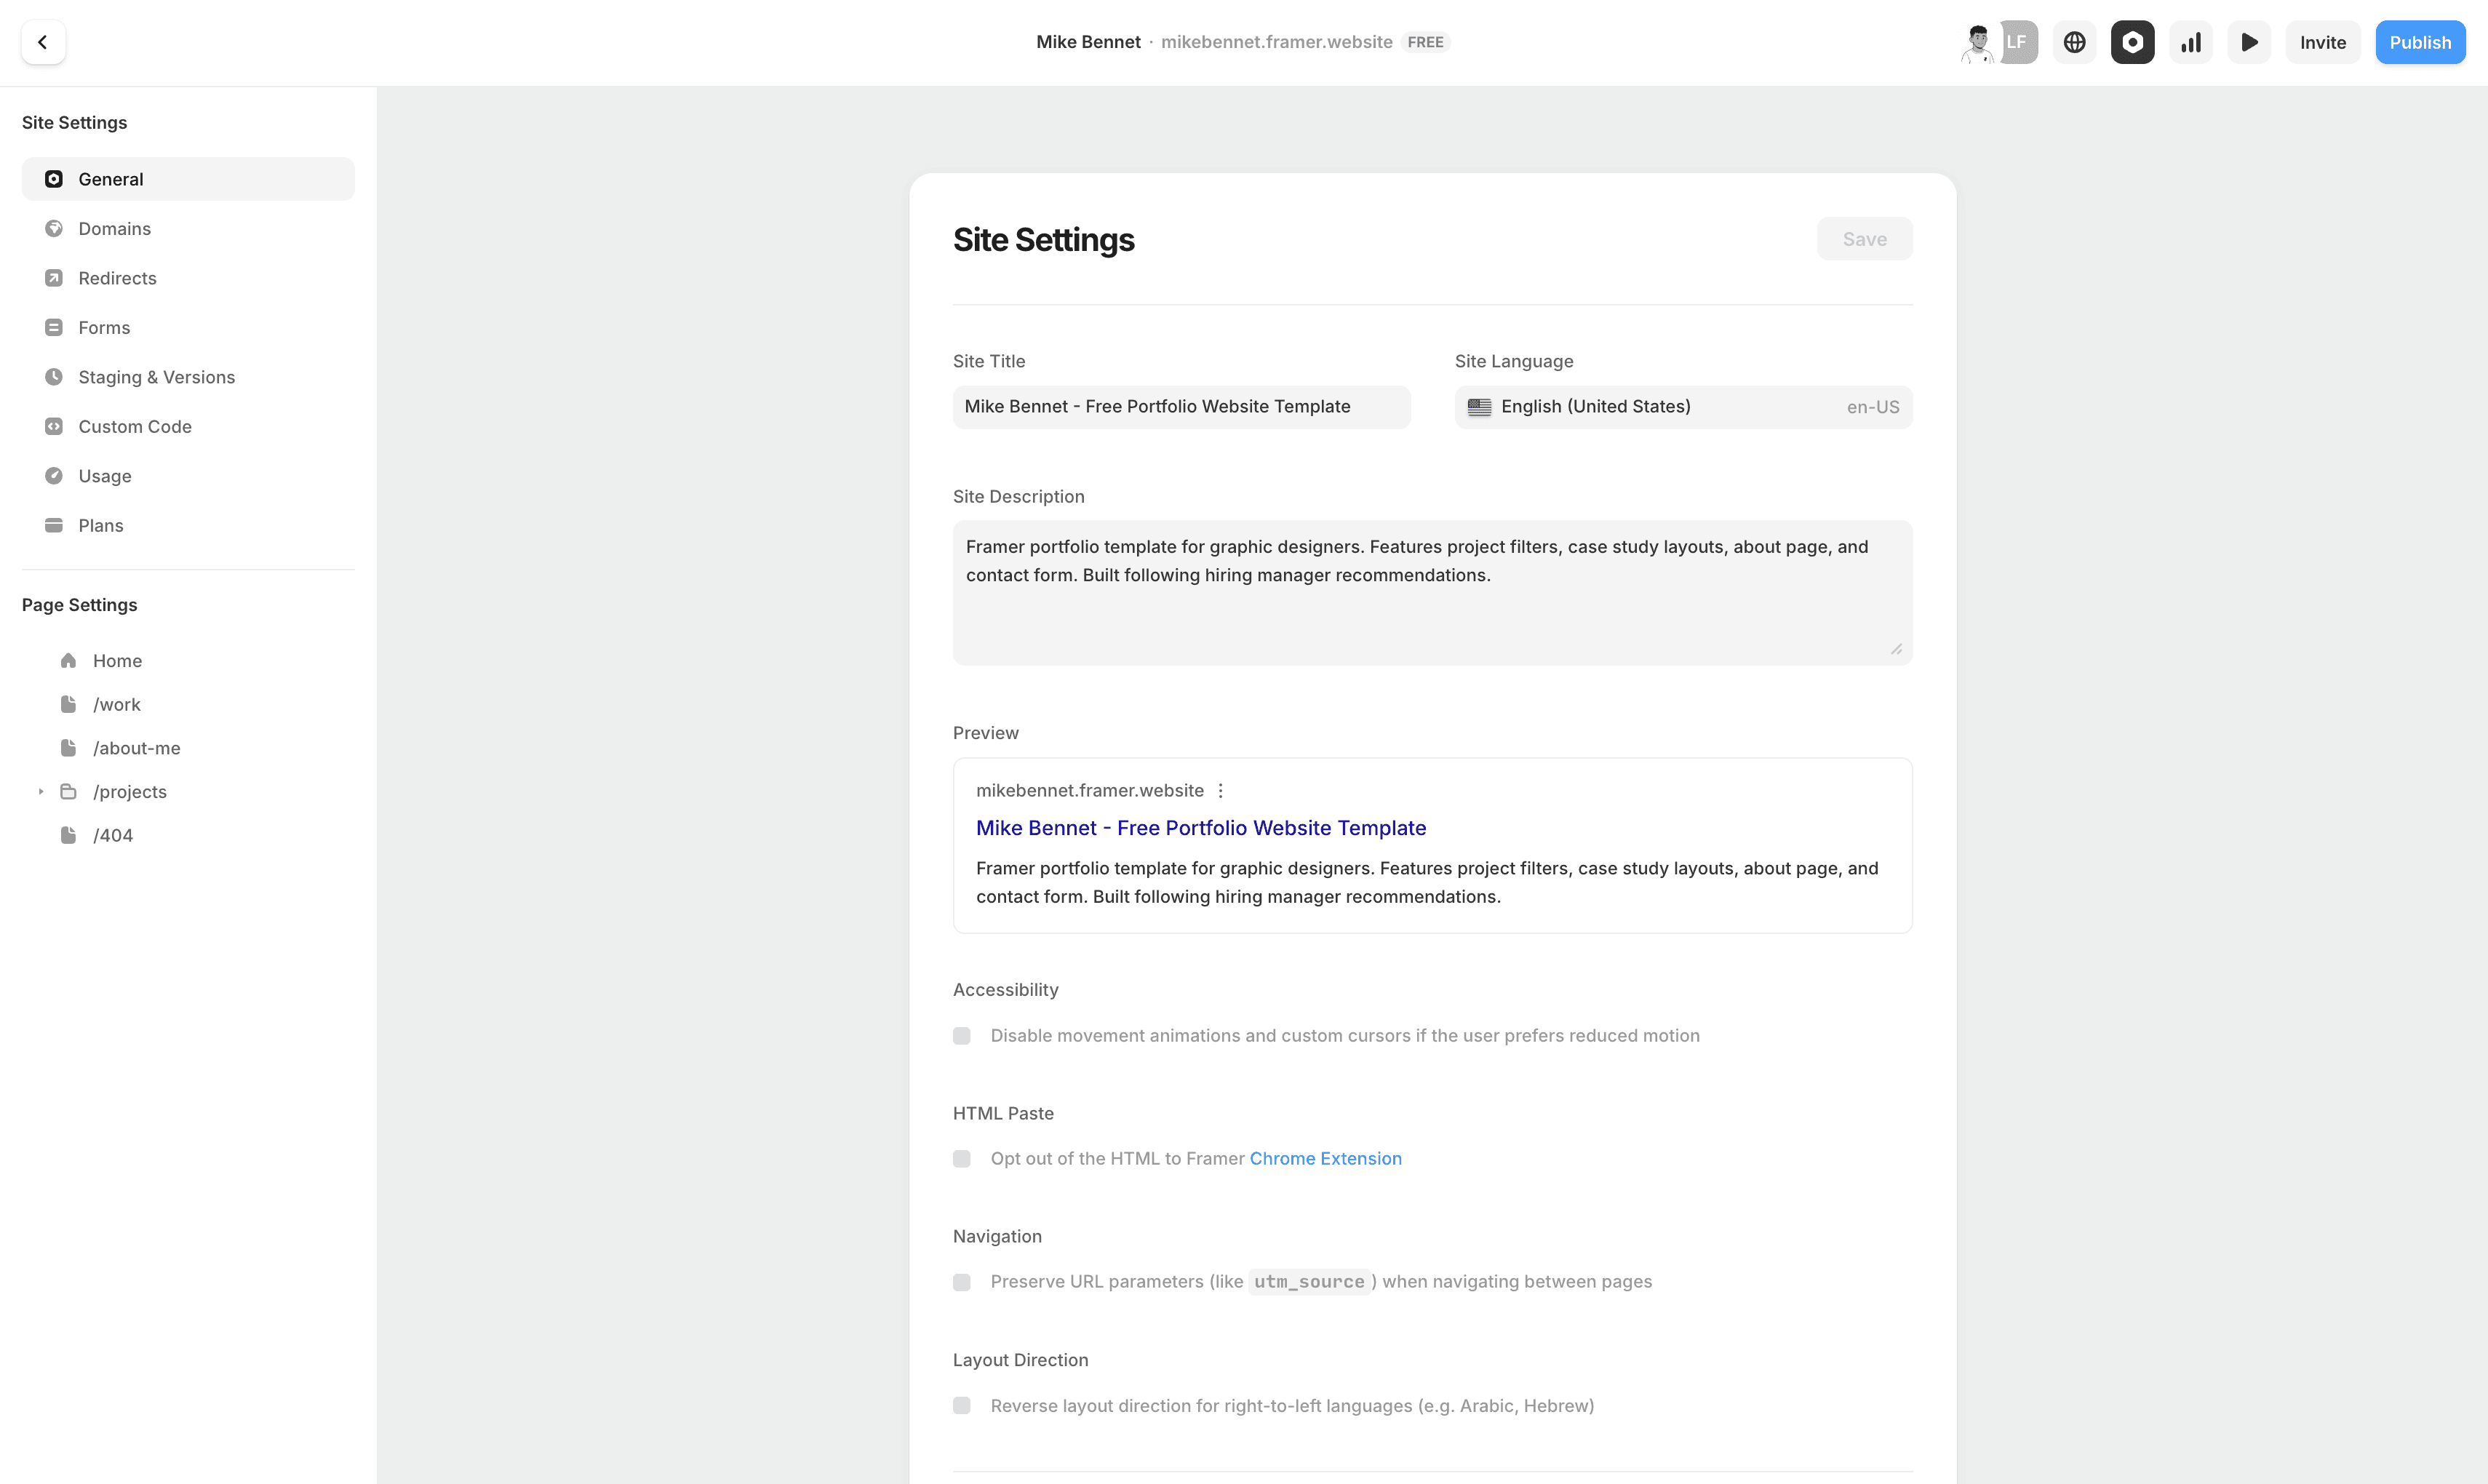
In the top right corner, you’ll see the Settings icon. Click it and you’ll open the Site Settings page.
At the top, you’ll find Meta Title, Meta Description, and the site language.
This is what people see when they find your site on Google. It’s also very important for SEO, since this is where you target keywords you want your site to rank for.
My advice is to research the keywords you want to rank for, then use Claude or ChatGPT to help you write your Meta Title and Meta Description.
You’ll also see a preview below showing how it will look in the browser.
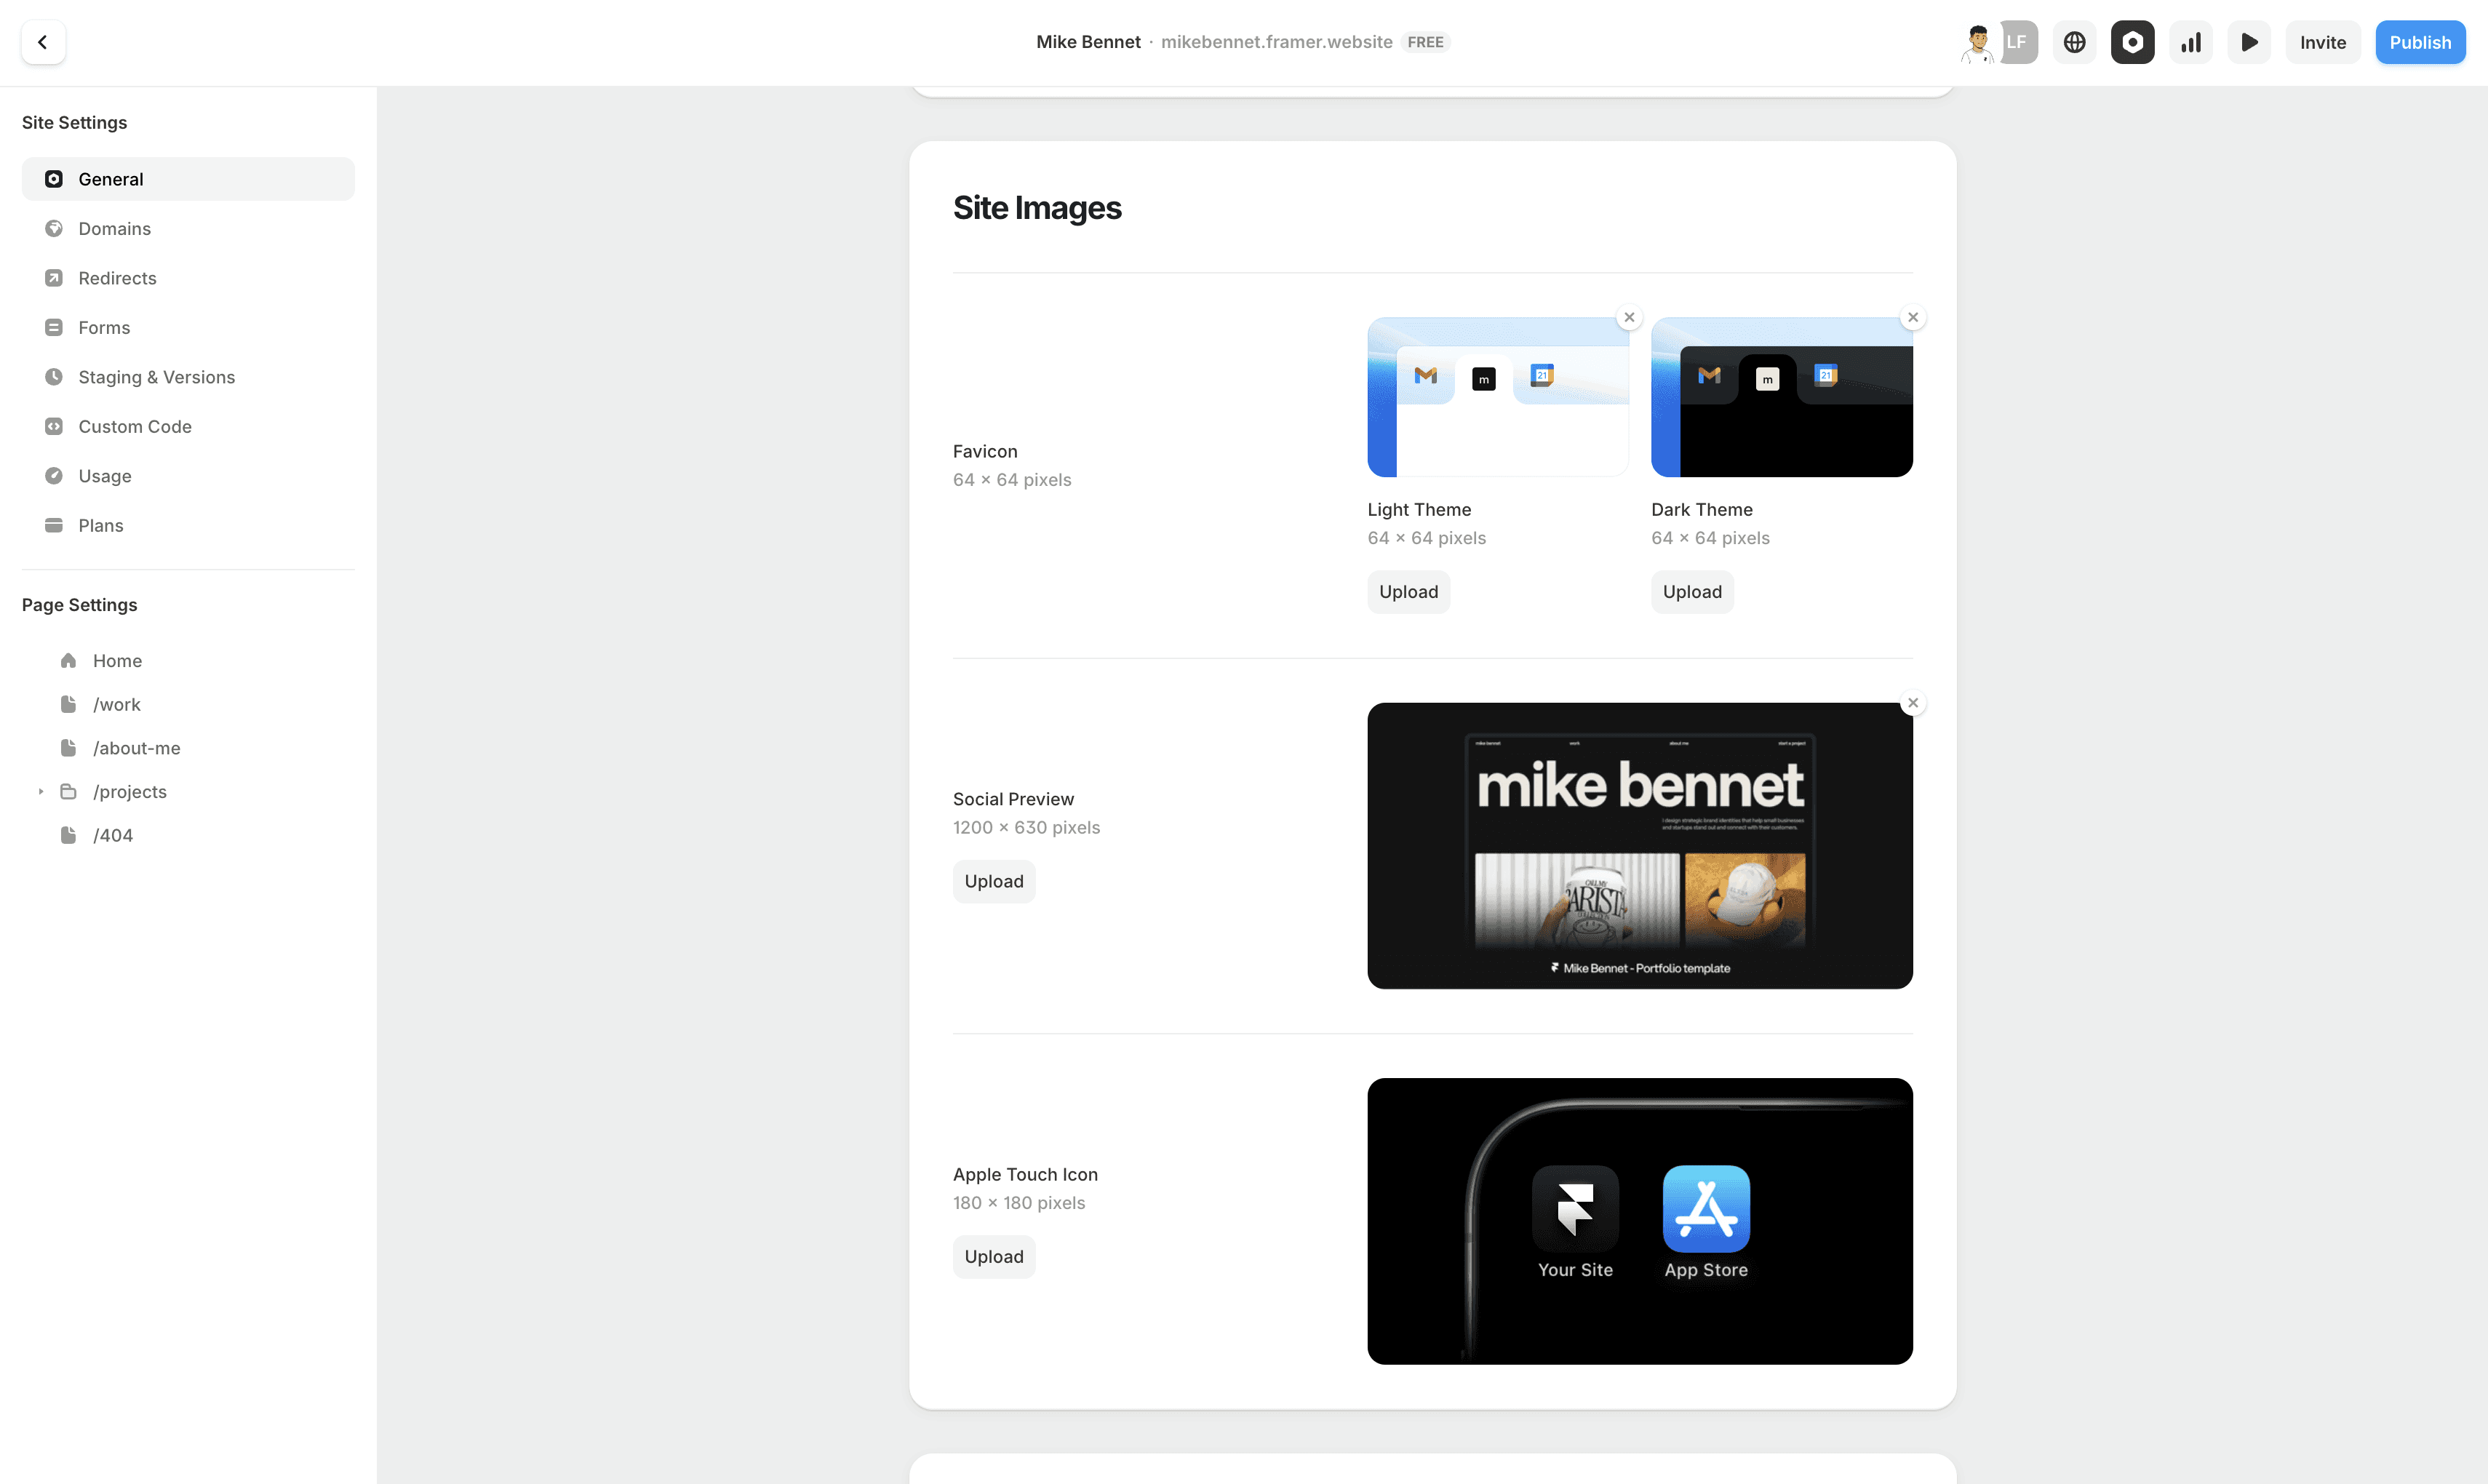
Site images
When someone opens your site, they’ll see a favicon in the browser tab along with the meta title.
Make sure to upload favicon icons for both light and dark mode.
This is usually your logo, and the recommended size is 64x64.
Below that, you’ll find the Social Preview Image with dimensions 1200x630.
This is important because when you share your link or post it on social media, this is the image people will see.
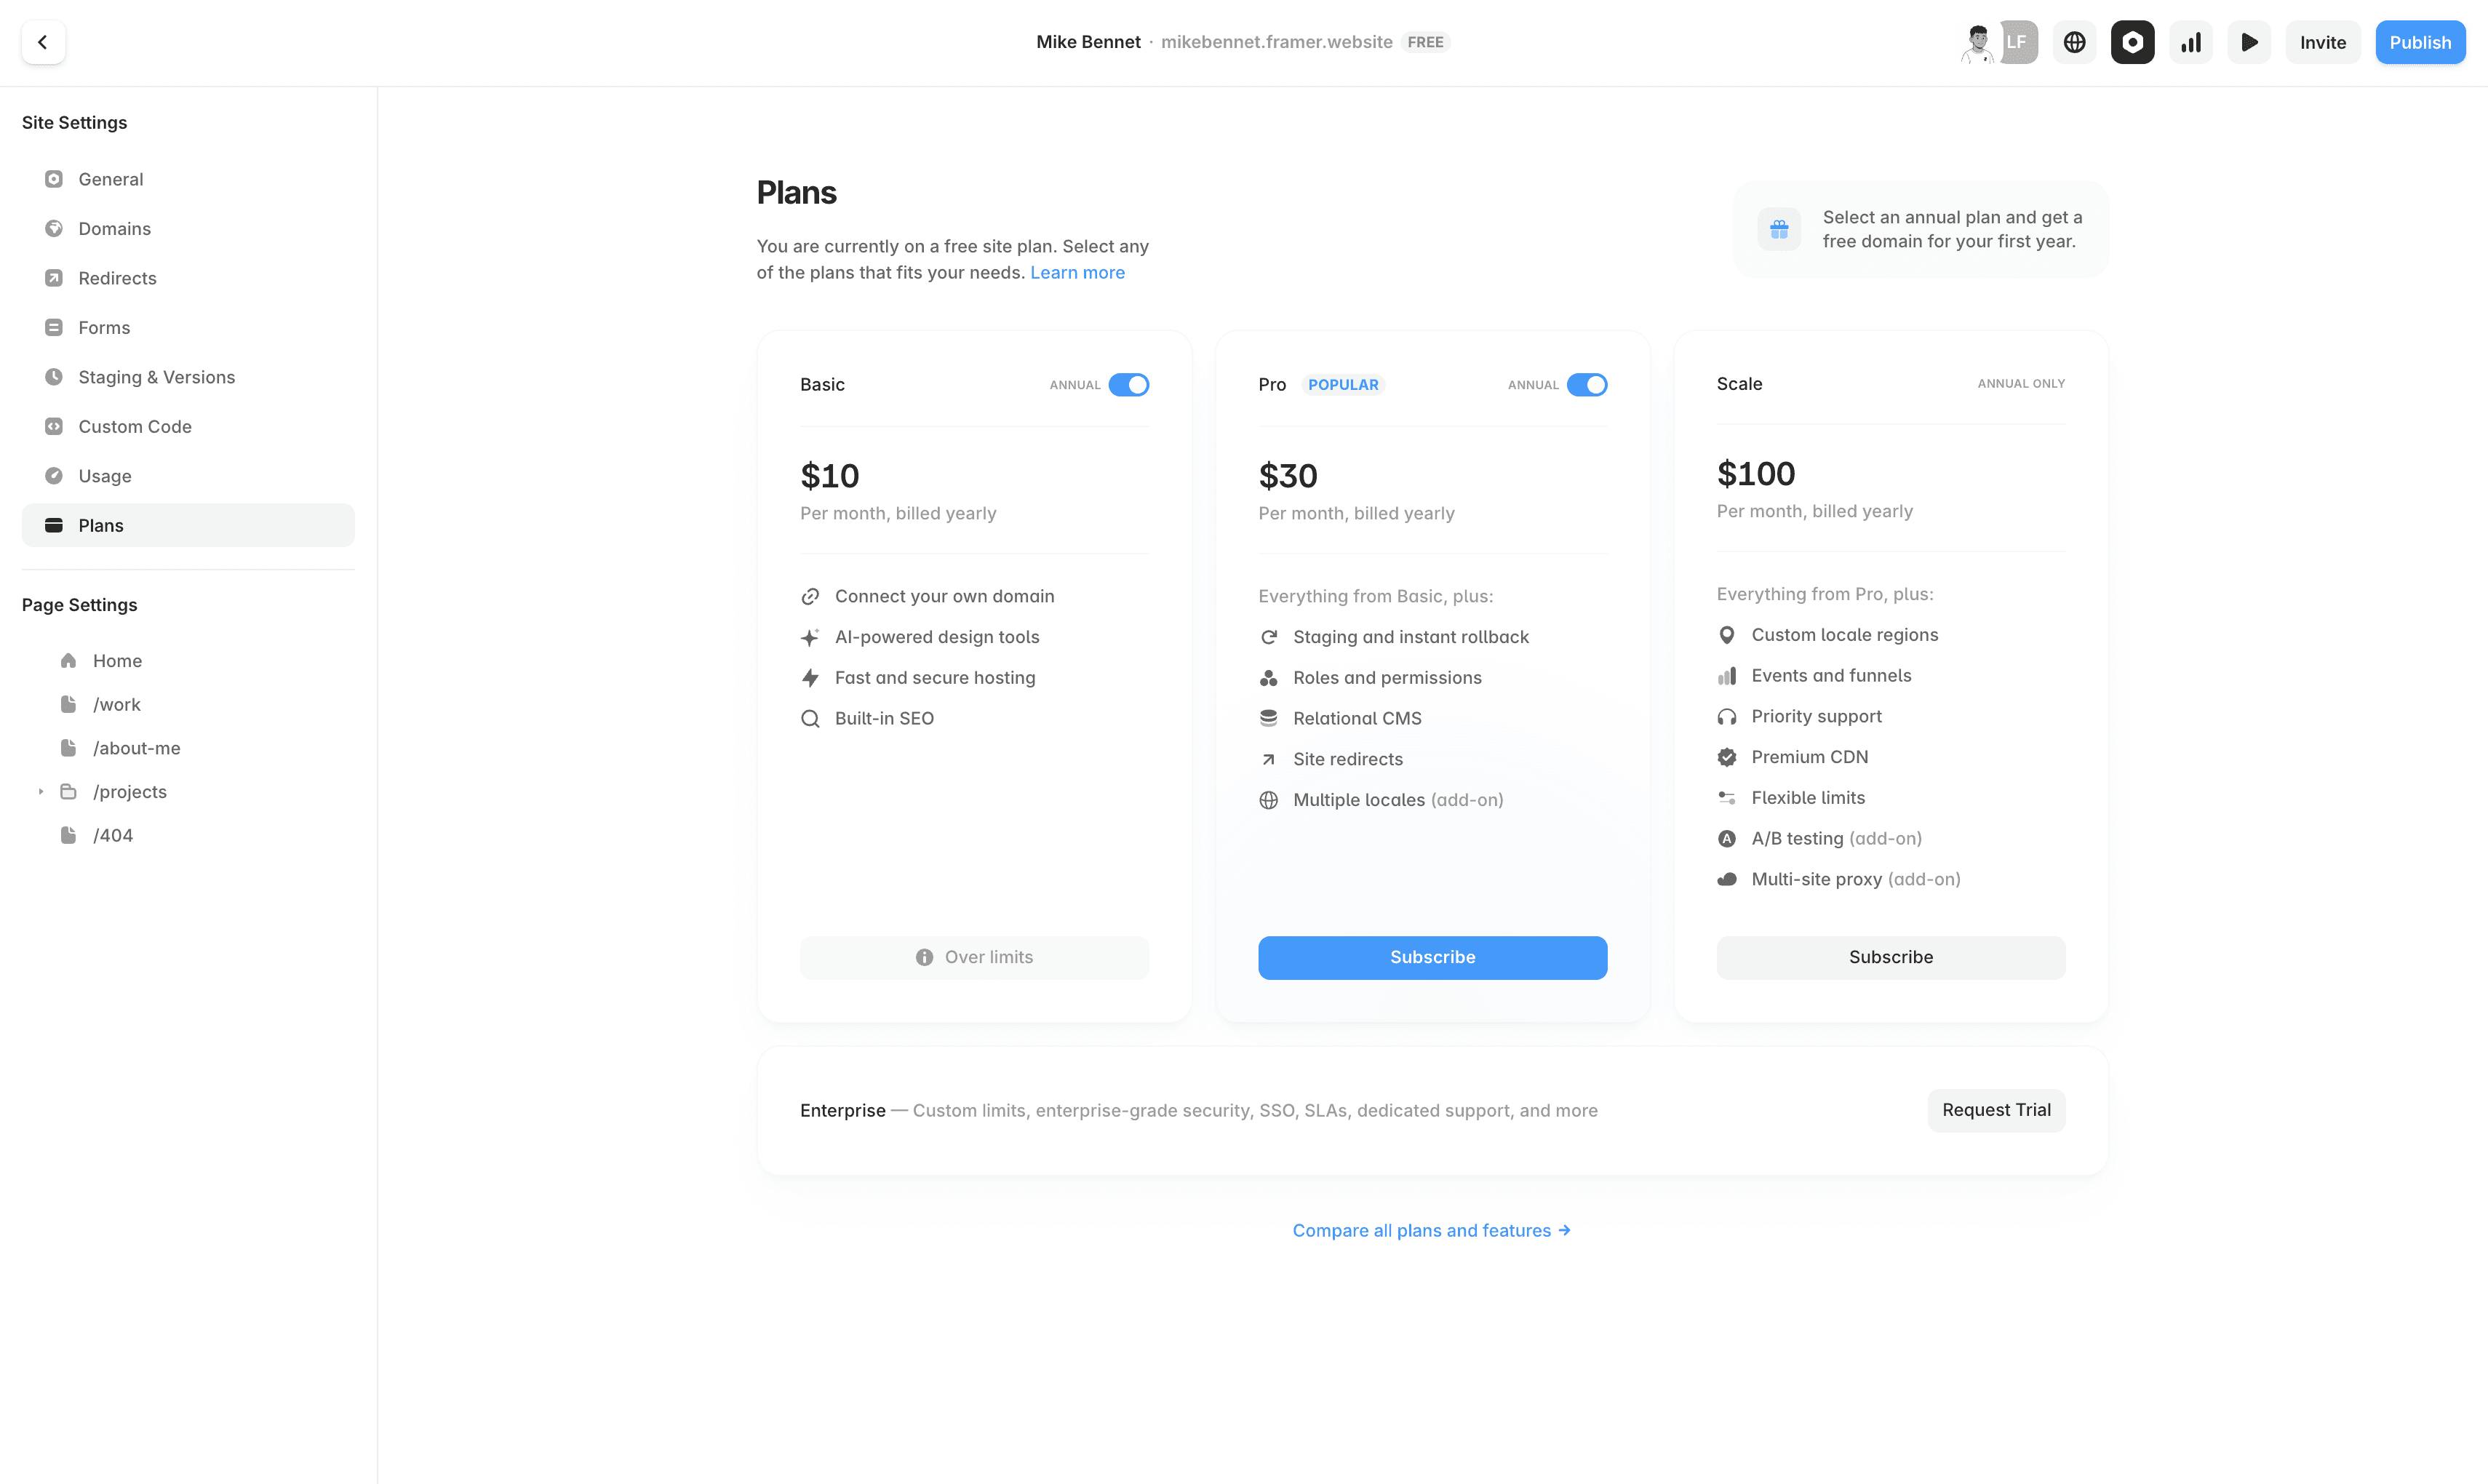
Buying a Framer plan
To successfully launch your site with a custom domain, you’ll need to choose one of Framer’s three plans.
The differences usually depend on things like the number of CMS collections, multiple languages, and other features.
With every template, you get the code PARTNER25PROYEARLY, which gives you 3 months free if you choose a yearly plan.
Once you’ve purchased a plan, we can move on to domains.
How to set up a domain?
You have three options:
Use Framer’s free subdomain ending with framer.website
If you don’t have a custom domain yet but already have a plan, you can buy a custom domain directly from Framer
If you bought a domain from Namecheap, GoDaddy, or another third-party provider, you’ll need to connect it
If you choose the first or second option, you just enter the domain you want. If it’s available, it’s yours.
If you’re connecting a third-party domain, the process is a bit more complicated. I’ll be honest, it took me some time to fully understand it too, so I’ll leave you a very helpful link to follow.