Duplicating template
When you buy the template, you’ll get an email from Polar with the remix link to the template, plus some extra bonuses.
Click the remix link.
If you already have a Framer account, you’ll see a screen where you just click “Copy”.
If you don’t have an account yet, you’ll need to create one first, and then you’ll see the “Copy” screen.
That’s it, you’ve successfully duplicated the template. It’s yours now :D
Quick tip: rename the file at the top of the workspace right away and give it your business name. It’ll make things way easier to stay organized later.
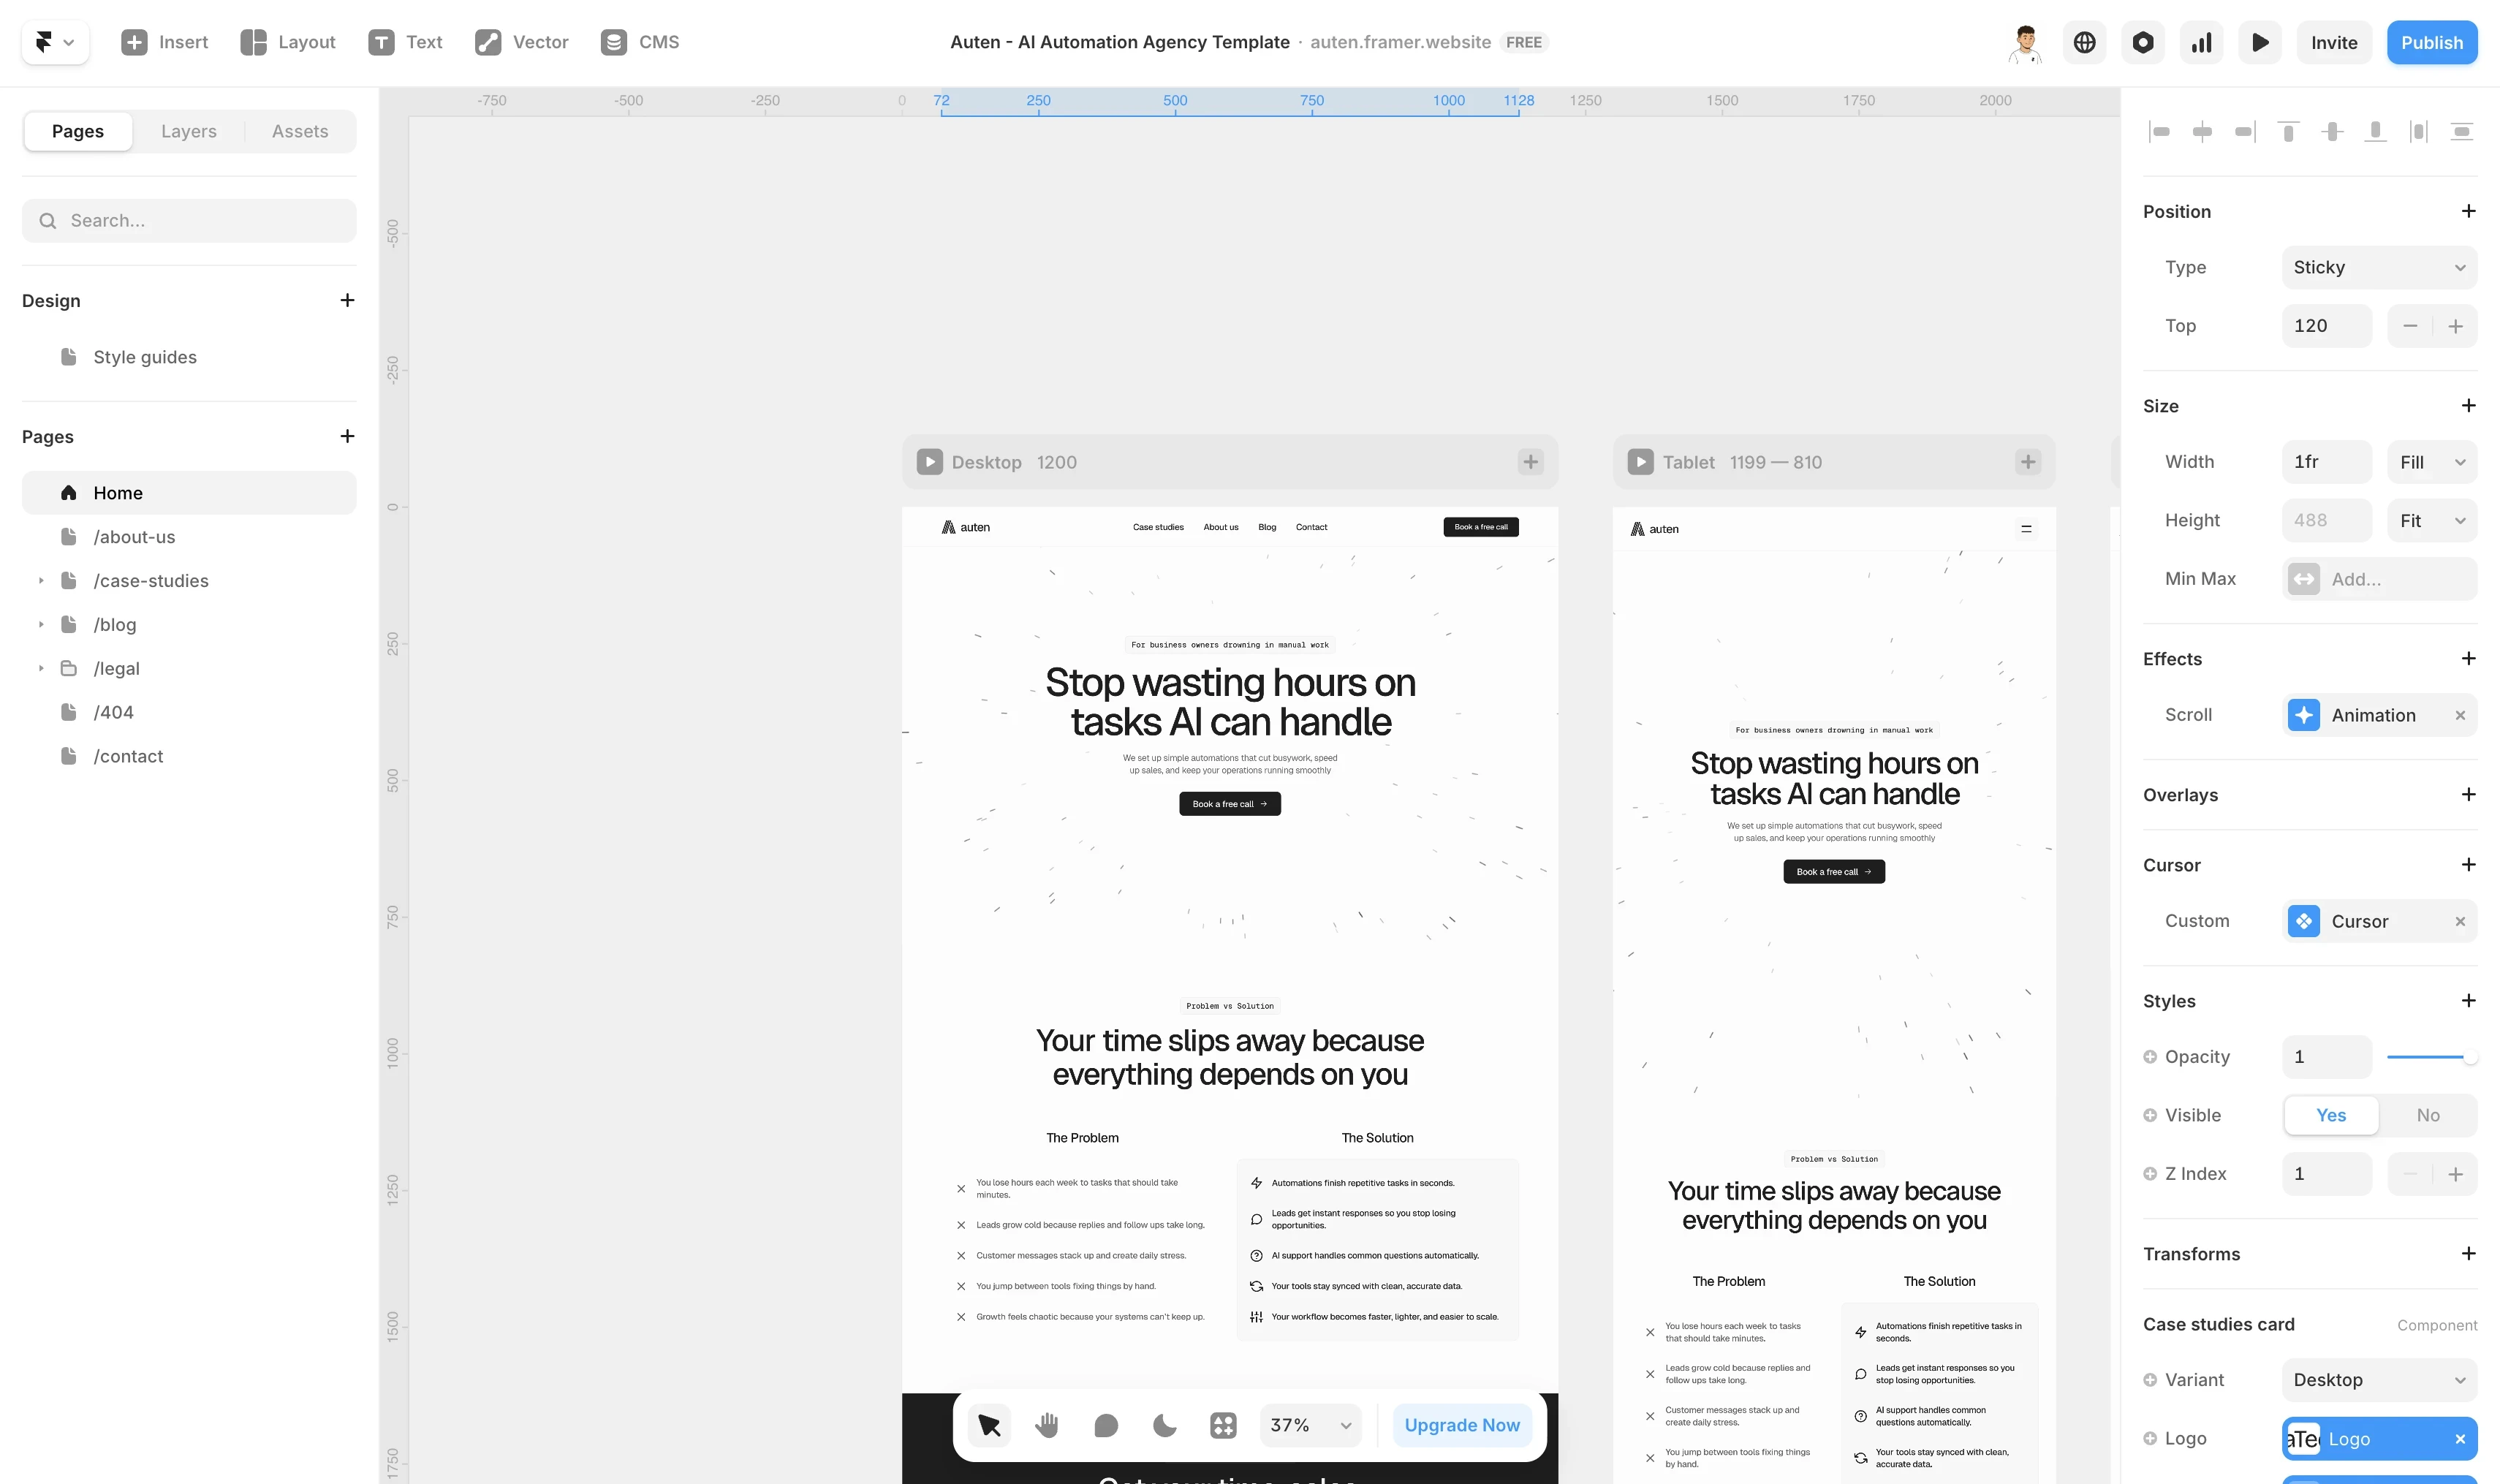
Framer workspace
The Framer workspace has four main parts:
Left sidebar
Canvas
Right panel
Top bar
Left sidebar has three sections:
Pages, where you see all pages on your site and can add or remove them
Layers, which shows every element on the site. Clicking a layer selects it on the canvas
Assets, where all components live, plus text styles, colors, and links. This is where you control all global styles
Canvas is the main area in the center. This is where you see your site with multiple breakpoints and visually select what you want to edit.
Right panel is where about 70% of template editing happens. Besides technical options, you can edit all content here by clicking a layer.
All components are edited in the right panel using variables. Framer makes content editing incredibly simple.
Top bar includes project settings and shortcuts on the left, and site settings on the right like localization, analytics, preview, and publish.
The most common mistakes people make
Forgetting to hit the Publish button. You can edit all day, but it’s pointless if no one can see it.
Editing on the wrong breakpoint. Main changes should always be done on the desktop breakpoint since everything else updates automatically.
Editing the component itself instead of the instance on the canvas. Most component changes should be done from the right panel.